Install and Configuration of Apache Hive-3.1.2 on multi-node Hadoop-3.2.0 cluster with MySQL for Hive metastore
The apache Hive is a data warehouse system built on top of the Apache Hadoop. Hive can be utilized for easy data summarization, ad-hoc queries, analysis of large datasets stores in various databases or file systems integrated with Hadoop. Ideally, we use Hive to apply structure (tables) on persisted a large amount of unstructured data in HDFS and subsequently query those data for analysis. The objective of this article is to provide step by step procedure in sequence, to install and configure the latest version of Apache Hive (3.1.2) on top of the existing multi-node Hadoop cluster. In a future post, I will detail out how can we use Kibana for data visualization by integrating Elastic Search with Hive. Apache Hadoop -3.2.0 was deployed and running successfully in the cluster. Here is the list of environment and required components.
- Existing up and running Hadoop cluster where Hadoop-3.2.0 deployed and configured with 4 DataNodes. Please go through the link if you wish to create a multi-node cluster to deploy Hadoop-3.2.0.
- Apache Hive-3.1.2. tar ball. It can be downloaded from the Apache mirror.
- MySQL. Installed and used Server version : 5.5.62
Step -1:- Untar apache-hive-3.1.2-bin.tar.gz and set up Hive environment
1. Select a healthy DataNode with high hardware resource configuration in the cluster if we wish to install Hive and MySQL together. Here, the used DataNode has 16GB RAM and 1 TB HD for both Hive and MySQL together.
2. Extract the previous downloaded apache-hive-3.1.2-bin.tar.gz from the terminal and rename as hive.
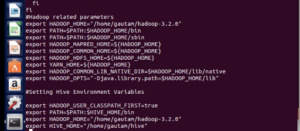
3. Update the ~/.bashrc file to accommodate the hive environment variables.
4. Please re login and try below to check environment variable
echo $HIVE_HOME
echo $HIVE_CONF_DIR
5. Copy hive-env.sh.template to hive-env.sh and update with all read write access
6. Update hive-env.sh available inside conf dir with the HADOOP_HOME and HIVE_CONF_DIR
Step-2:- MySQL Database installation for Hive metastore persistence and mysql java connector.
As said above, both Hive and MySQL database has installed in the same DataNode in the cluster. Here are the steps to install MySQl database , create schema named as metastore and subsequently update the schema by executing hive-schema-2.3.0.mysql.sql. This sql script has all the table creation, update etc command that specifically provided by Apache Hive for MySQL database.
1. Download MySQL through terminal.
2. During installation it will ask to set database user “root” and its password. Set it and note it down.
3. Download and copy mysql java connector (mysql-connector-java-5.1.28.jar) to lib folder of Hive.
By default, mysql-connector-java-5.1.28.jar will be download under /usr/share/java folder.
4. Start MySQL service. Ideally mysql service starts automatically after successful installation.
sudo service mysql start
sudo service mysql status
5. Create metastore database for Hive here by executing following commands from mysql command prompt.
mysql -u root -p<password>
mysql> CREATE DATABASE metastore;
mysql> USE metastore;
mysql> SOURCE /home/<<ubuntu>>/hive/scripts/metastore/upgrade/mysql/hive-schema-3.1.0.mysql.sql
mysql> GRANT all on *.* to ‘root’@localhost;
mysql> flush privileges;
You can create separate user in MySQL if don’t wish to continue as ‘root’ user.
6. Rename hive-default.xml.template to hive-site.xml available under conf directory.
Step -3:- Update hive-site .xml
In hive-site.xml, we have option to mention what execution engine to be used by hive when we fire HQL query. Map Reduce has been depreciated now because of performance issue. Based on the stored data volume in HDFS as well as type of queries, either we can use tez or spark as a default execution engine of Hive to boost performance for query data. Here are properties in hive-site.xml those need to be mentioned with name and value to accommodate with current cluster settings.
1 MySQL Database Connection URL
2. User name to connect with MySQL Database
3. Password to login with created user in MySQL
4. Execution engine name which Hive internally use to execute queries. Can use Spark or Tez for better performance.
5. Scratch dir location
Step-4:- Work on HDFS.
Since Hive will run on top HDFS, we need to make sure Hadoop multi-node cluster is started and all daemons are running without any issue. To verify, browse the Hadoop web admin page. Create Hive directory on the HDFS using following commands with subsequent permissions using terminal on the NameNode or MasterNode in the cluster.
hadoop-3.2.0/bin >./hdfs dfs -mkdir /user/
hadoop-3.2.0/bin >./hdfs dfs -mkdir /user/hive
hadoop-3.2.0/bin >./hdfs dfs -mkdir /user/hive/warehouse
hadoop-3.2.0/bin >./hdfs dfs -mkdir /tmp
hadoop-3.2.0/bin >./hdfs dfs -chmod -R a+rwx /user/hive/warehouse
hadoop-3.2.0/bin >./hdfs dfs -chmod g+w /tmp
Step-5:- Access Hive CLI
Execute the hive command inside bin directory of Hive using terminal of the DataNode where Hive installed and configured. We should see the “hive>” prompt for successful installation.
There are multiple options available to connect with Hive to execute HQL queries, data loading etc. Hive CLI can be used by default but Hive should be installed on the same machine or the DataNode in the cluster. It connects directly to the Hive Driver. Hive CLI won’t used in real time/ production environment. since it’s depreciated from Hive 2.0 onwards. HiveServer2 (HS2) is a service that enables clients to execute queries against Hive. HS2 supports multi-client concurrency and authentication. We don’t need any separate configuration for HiverServer2 . If we can access Hive CLI from terminal without any issue , HiverServer2 service can be started by executing following command in a separate terminal .
/hive/bin$ ./hive –service hiveserver2
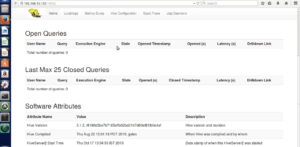
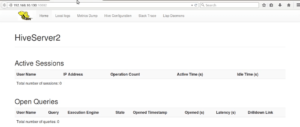
 And access the web ui of HiverServer2 from browser at default port 10002.
Beeline is another thin client CLI to execute queries via HiveServer2 which support concurrent client connection and authentication. Beeline can be leveraged by multiple user from multiple node in the cluster to execute queries. We can used Hive Web Interface (HWI) as a client to communicate with existing Hive deployment besides CLI. Please go through the link if you want to use HWI.
Ref:-
- https://hive.apache.org/index.html
- https://cwiki.apache.org/confluence/display/Hive/Setting+up+HiveServer2
- https://cwiki.apache.org/confluence/display/Hive/HiveServer2+Clients#HiveServer2Clients-Beeline–CommandLineShell
Can be reached for real-time POC development and hands-on technical training at [email protected]. Besides, to design, develop just as help in any Hadoop/Big Data handling related task. Gautam is a advisor and furthermore an Educator as well. Before that, he filled in as Sr. Technical Architect in different technologies and business space across numerous nations.
He is energetic about sharing information through blogs, preparing workshops on different Big Data related innovations, systems and related technologies.








Excellent written. Would be helpful for beginners who wish to setup his own environment for learning and practice.